> ## Documentation Index
> Fetch the complete documentation index at: https://docs.elementary-data.com/llms.txt
> Use this file to discover all available pages before exploring further.
# incident.io
Elementary's incident.io integration enables sending alerts to [incident.io](https://incident.io) when data issues are detected.
Alerts are sent as **alert events** to an incident.io [HTTP Alert Source](https://incident.io/docs/alerting/alert-sources). incident.io then creates or updates alerts based on your routing and escalation rules.
To send alerts to incident.io, you need to create [alert rules](/cloud/features/alerts-and-incidents/alert-rules) and select incident.io as the destination.
## Prerequisites
You need an incident.io account with access to create Alert Sources.
## Create an HTTP Alert Source in incident.io
Before connecting Elementary, you need to create an HTTP Alert Source in incident.io:
1. In incident.io, go to **Alerts** → **Configuration** → **Alert Sources**.
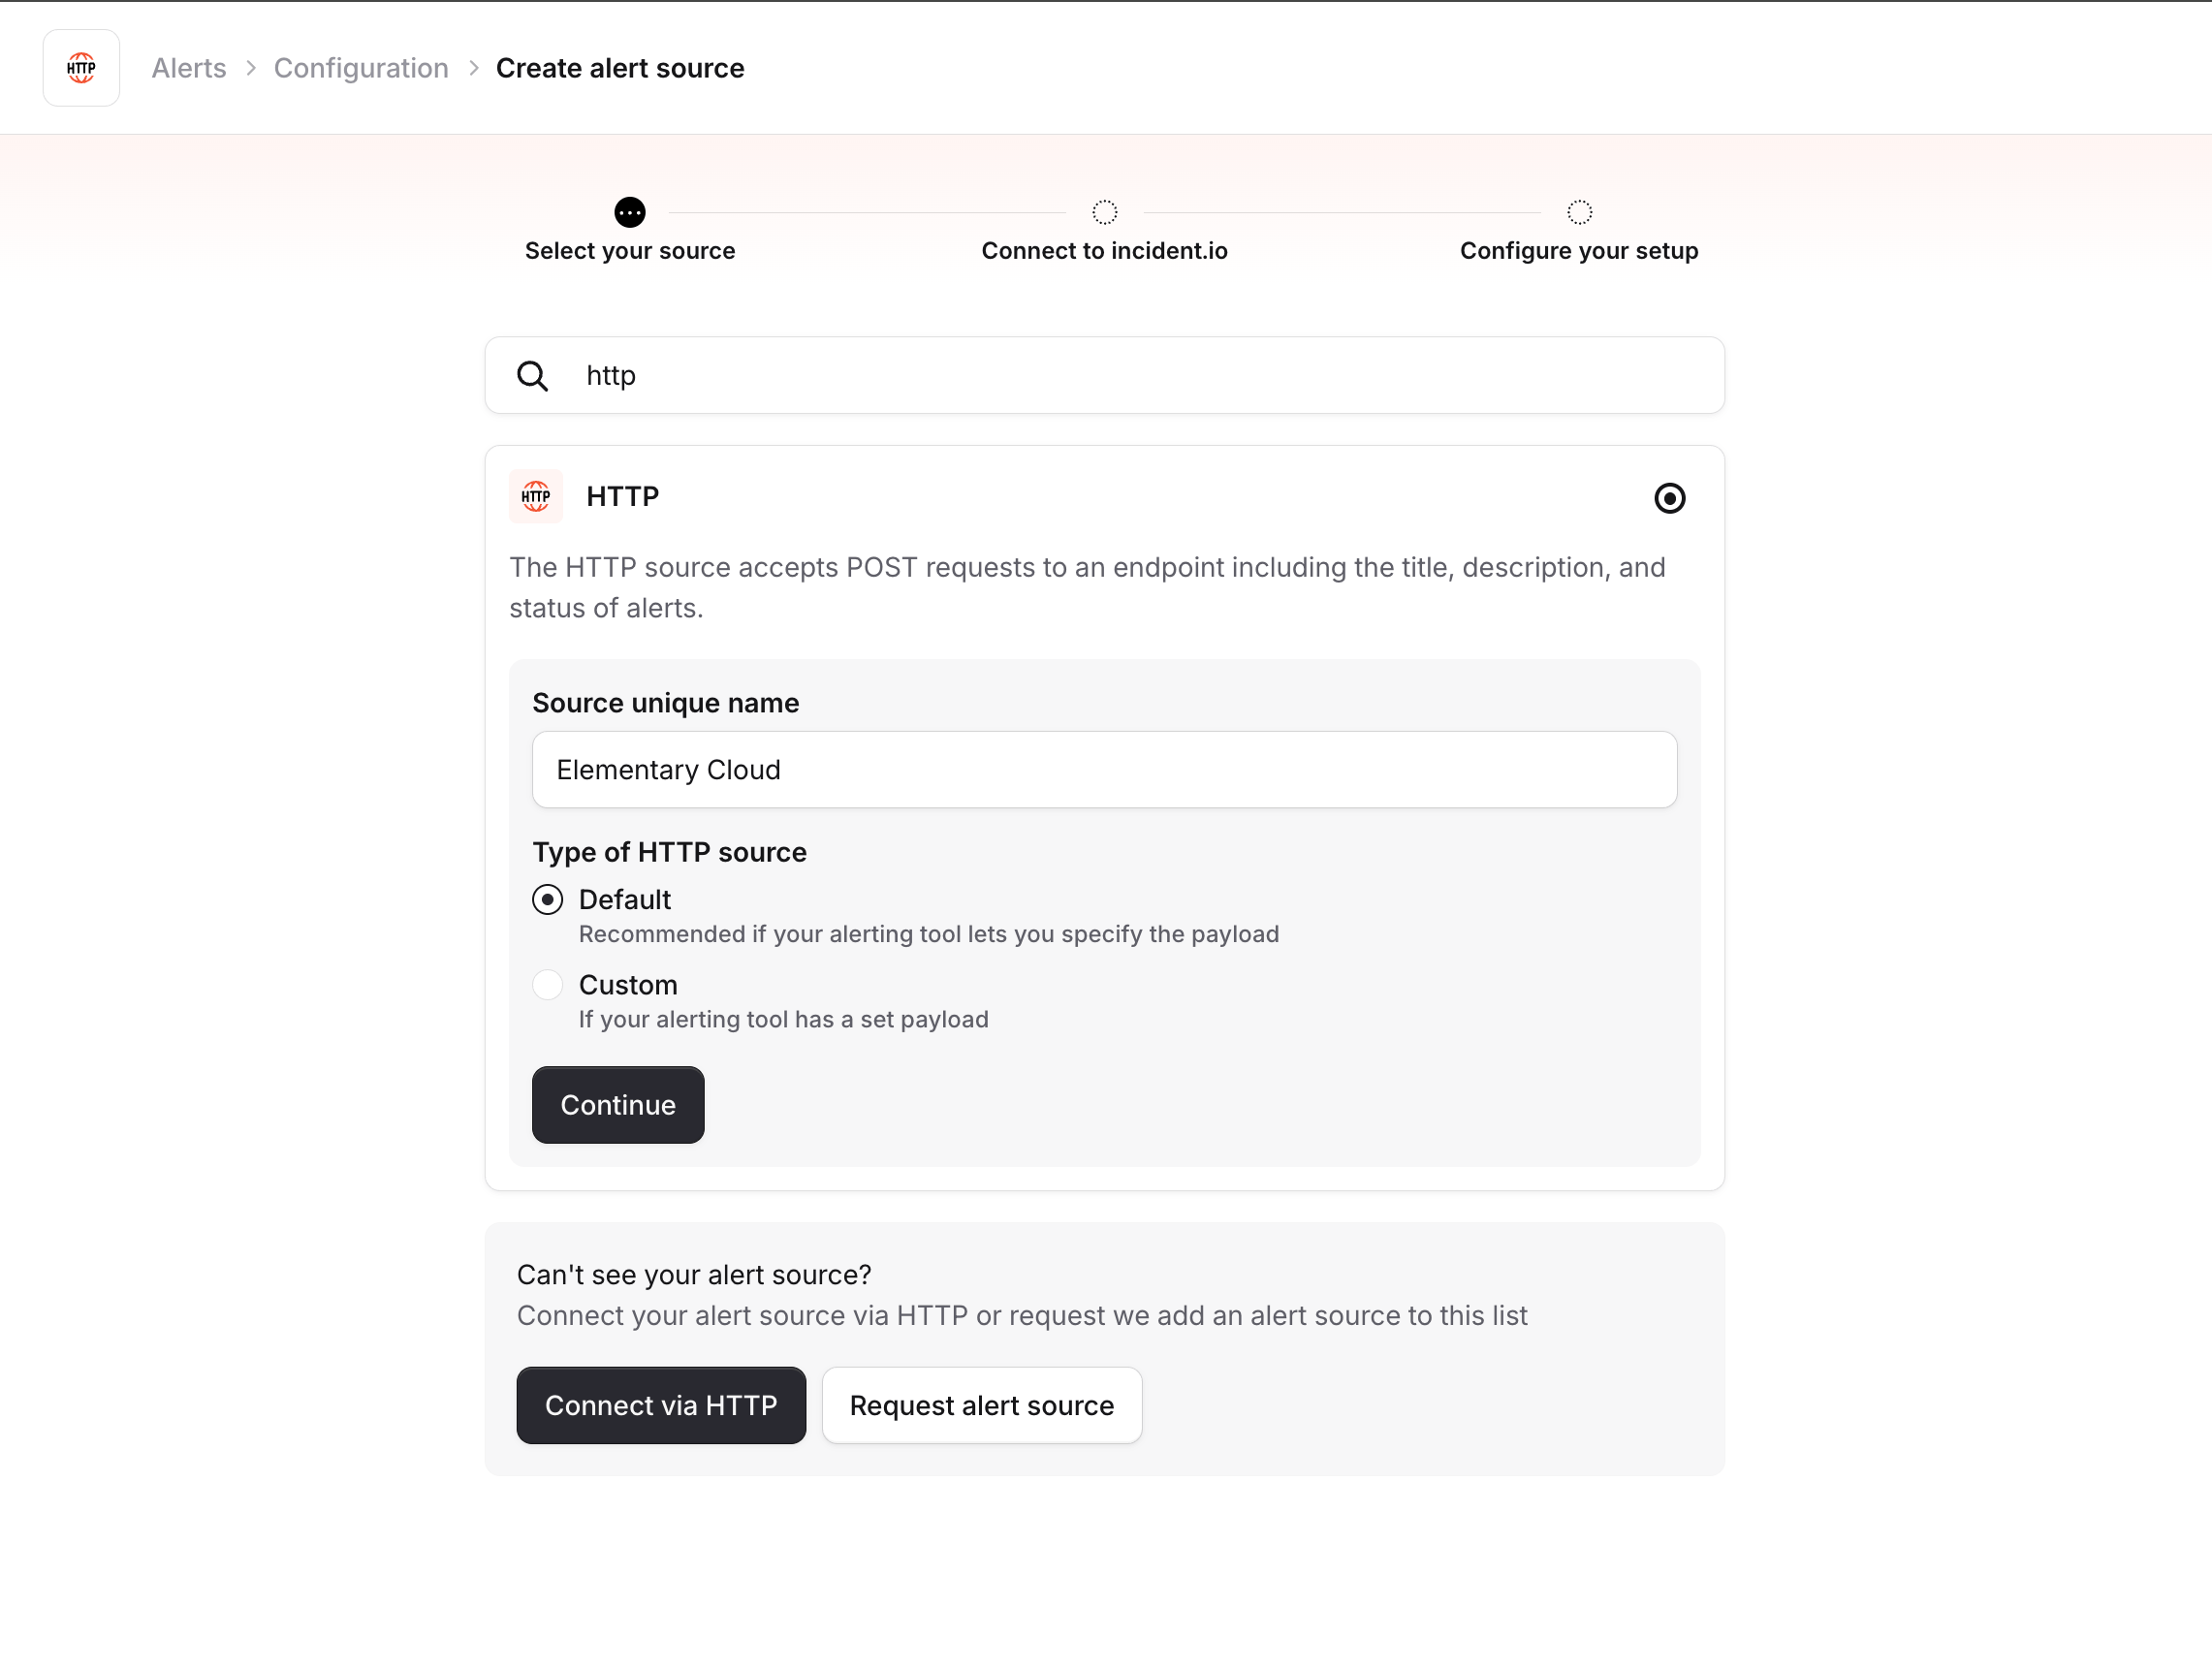
2. Click **Create alert source**, search for **HTTP**, and select it.
3. Give the alert source a name (e.g. "Elementary Cloud"), select **Default** as the type, and click **Continue**.
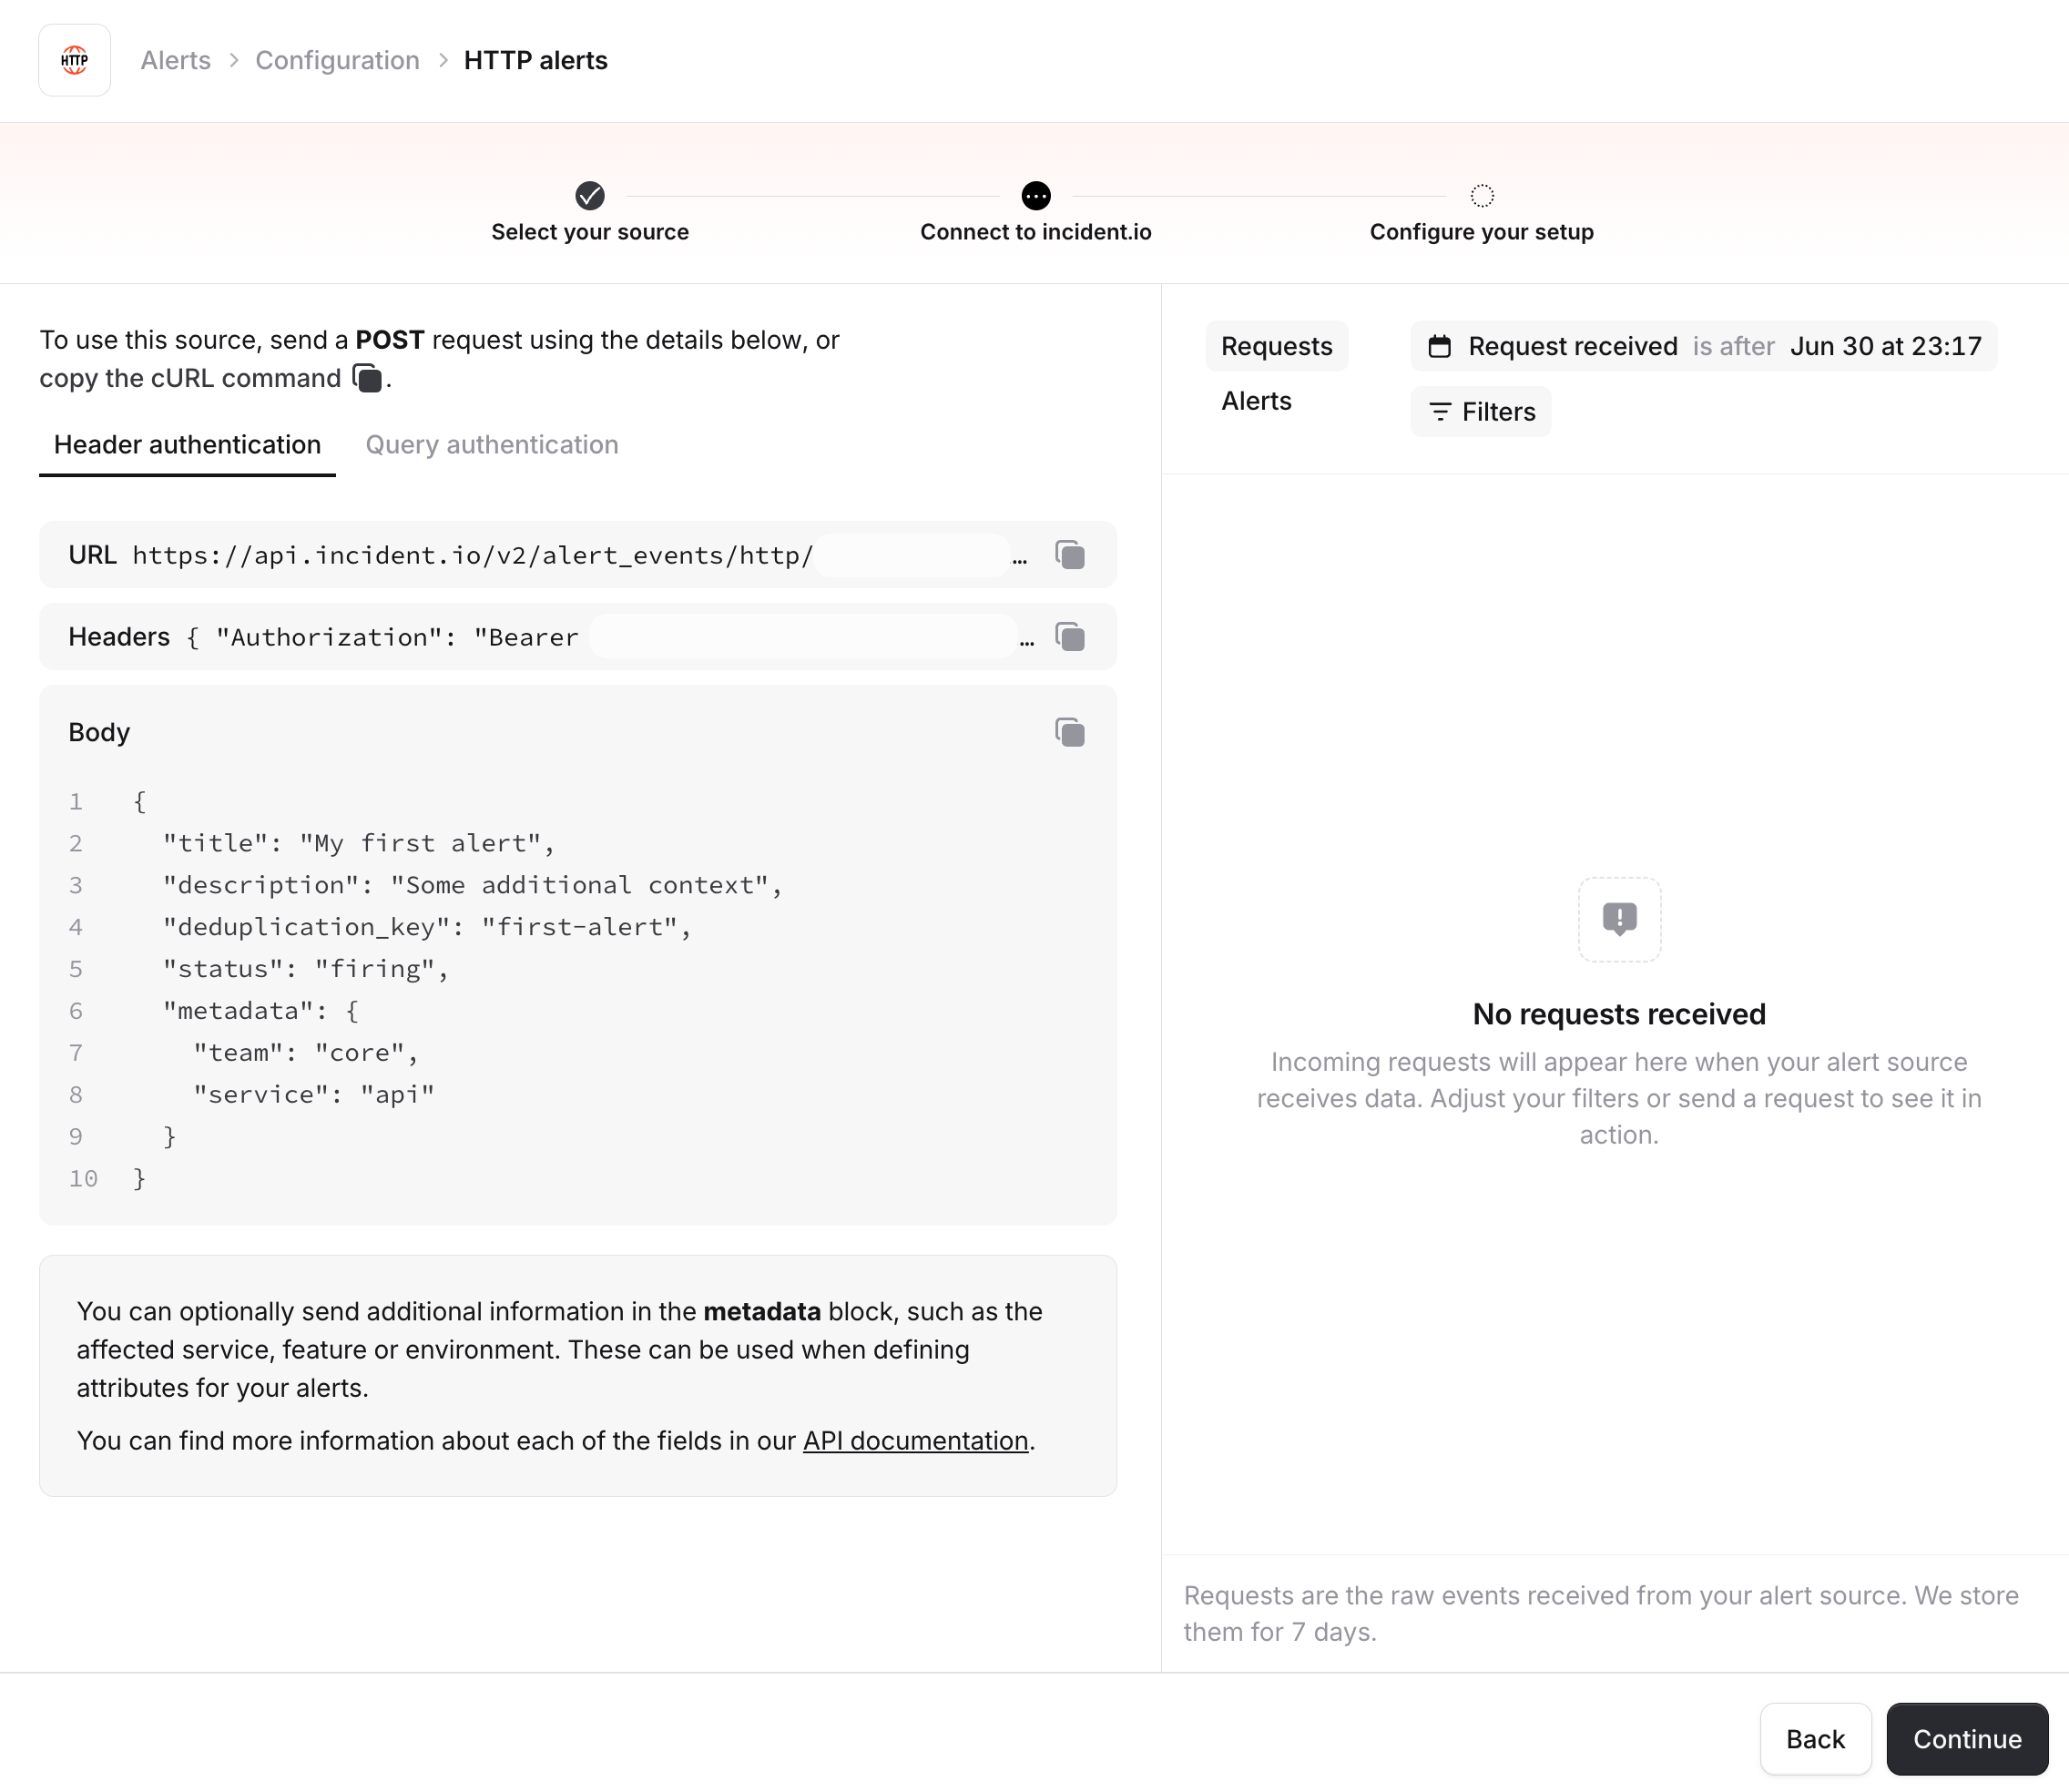
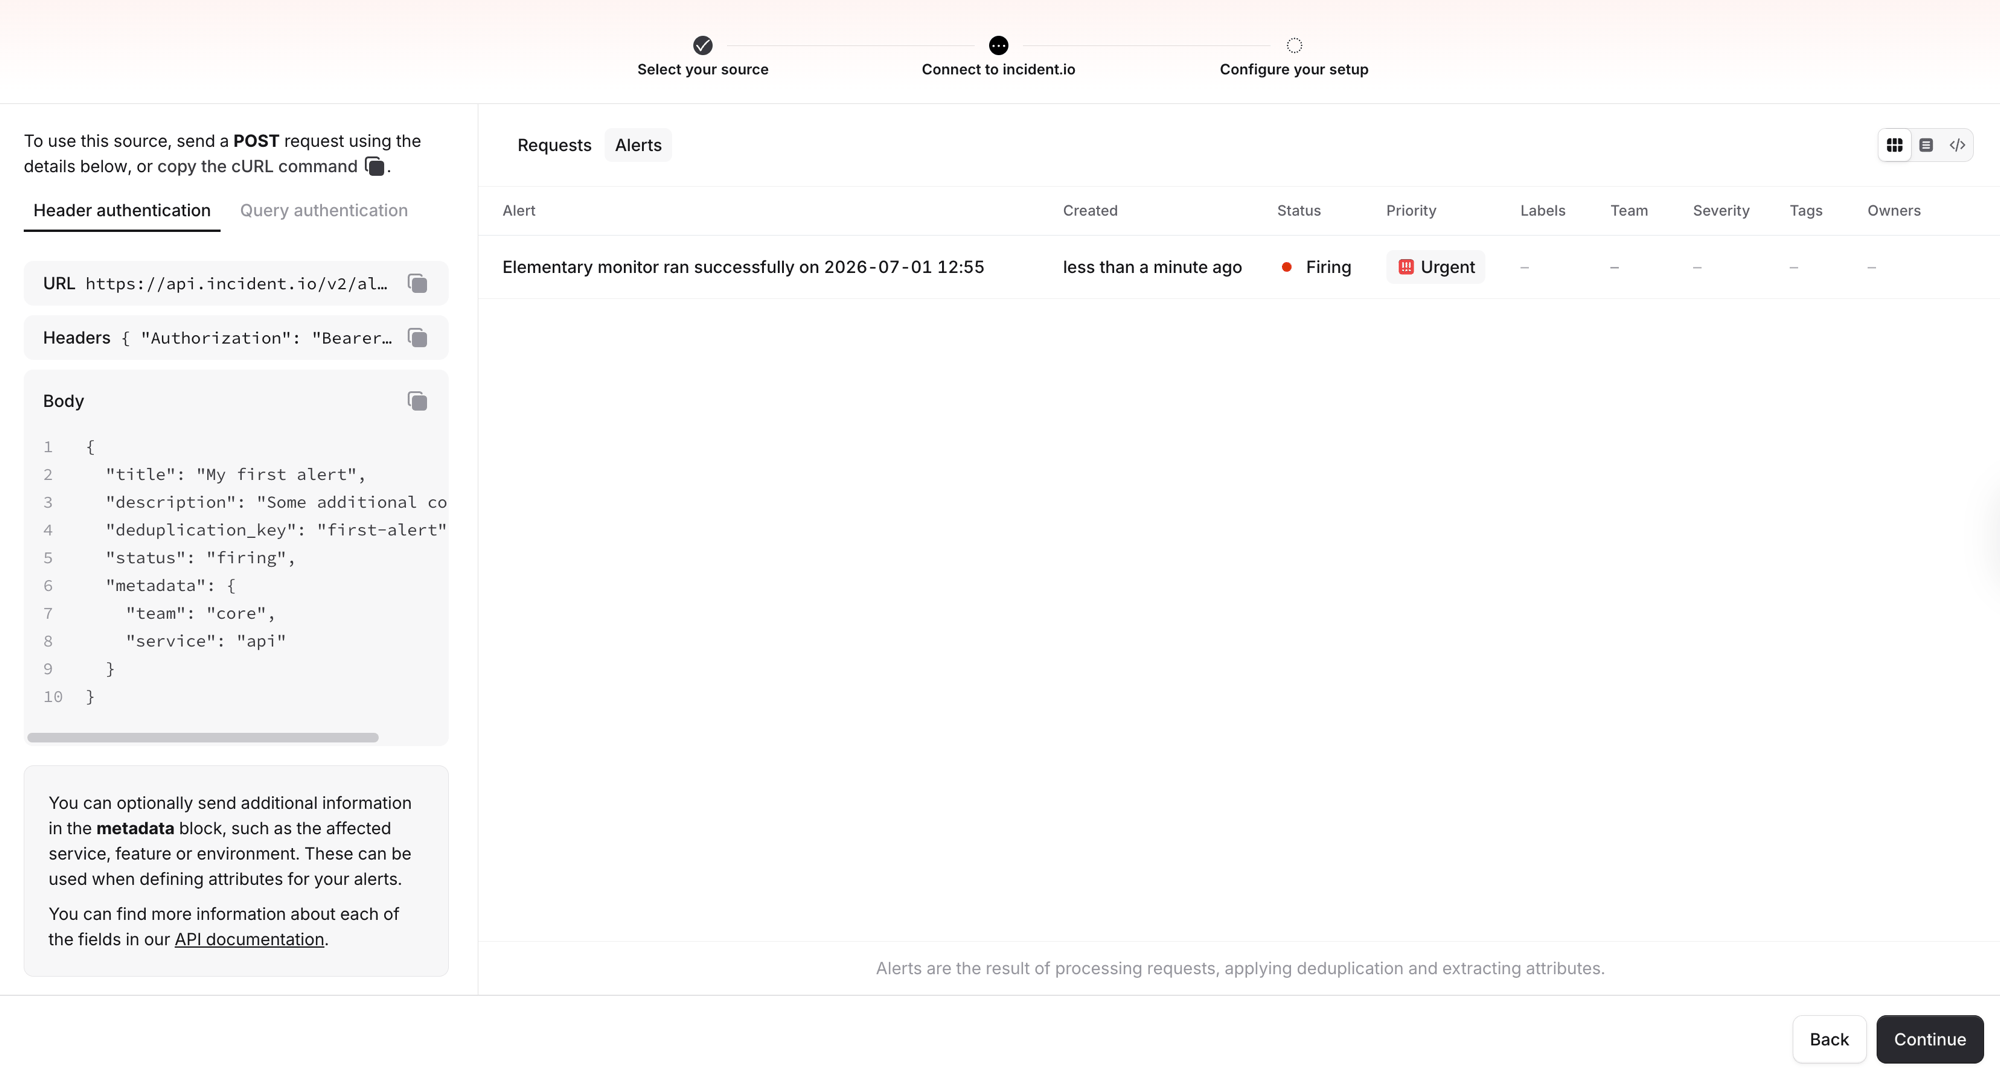
4. On the connection details page, you will see the **URL** and **authentication headers**. You will need the **alert source config ID** (from the URL) and the **API token** (from the Authorization header) when connecting in Elementary. Keep this page open — you will come back to it after sending a test alert.
The API token is a secret. Keep it secure and do not share it publicly.
## Connect incident.io in Elementary
1. Go to the **Environments** page on the sidebar.
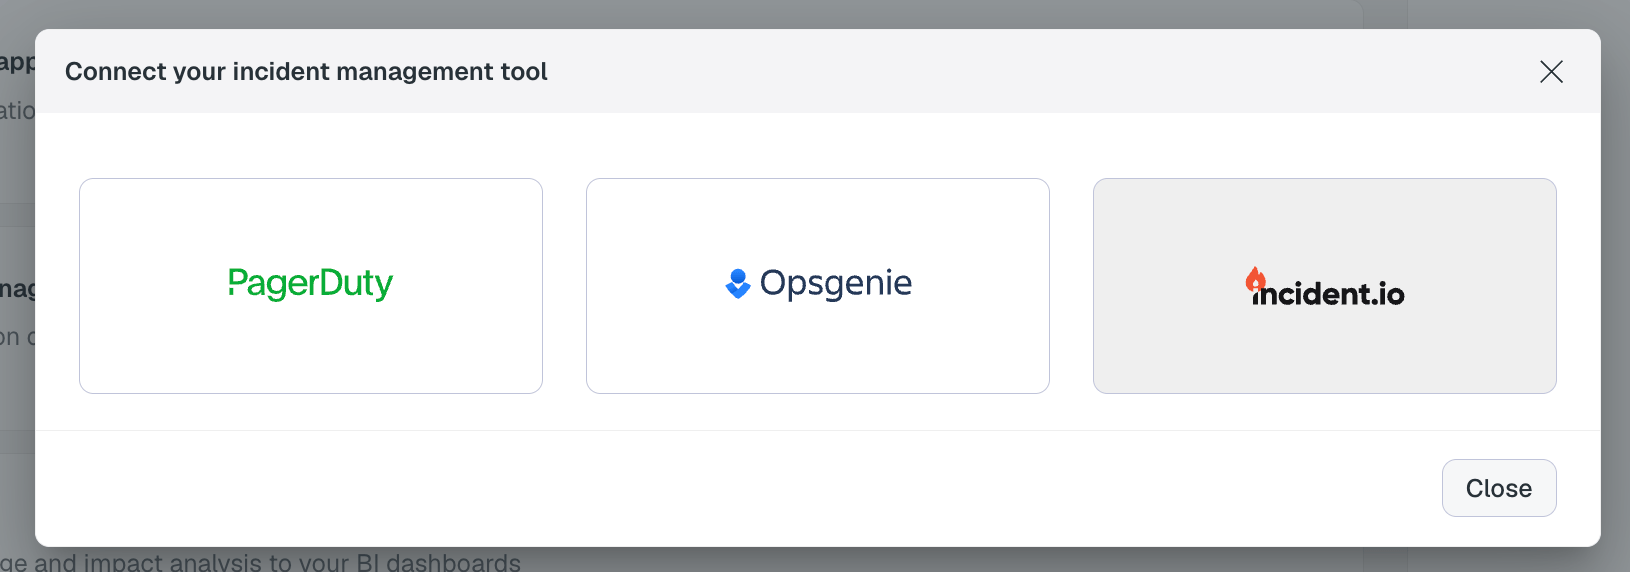
2. Select an environment and click connect on the **Connect incident management tool** card, and select **incident.io**.
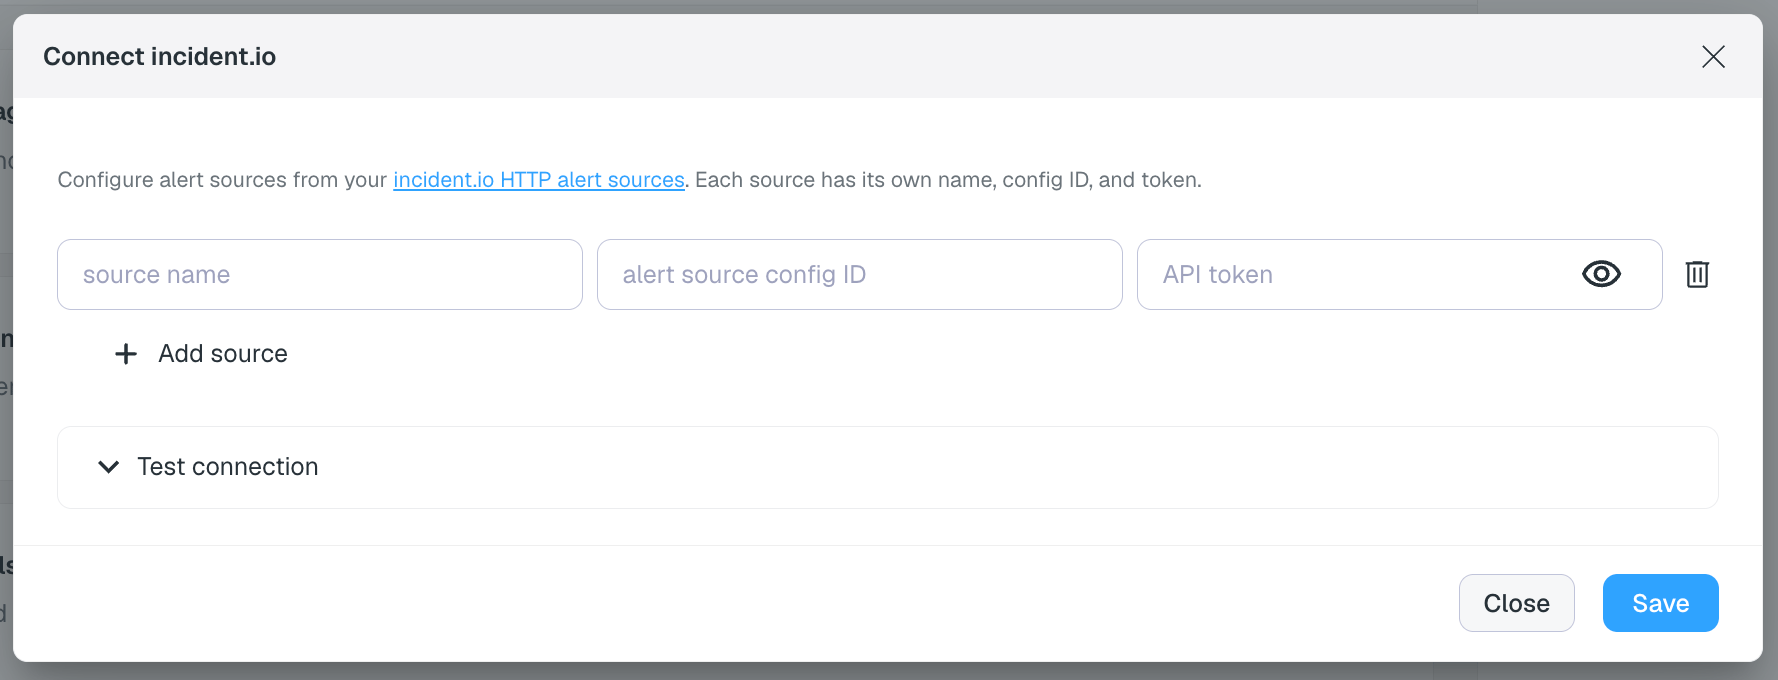
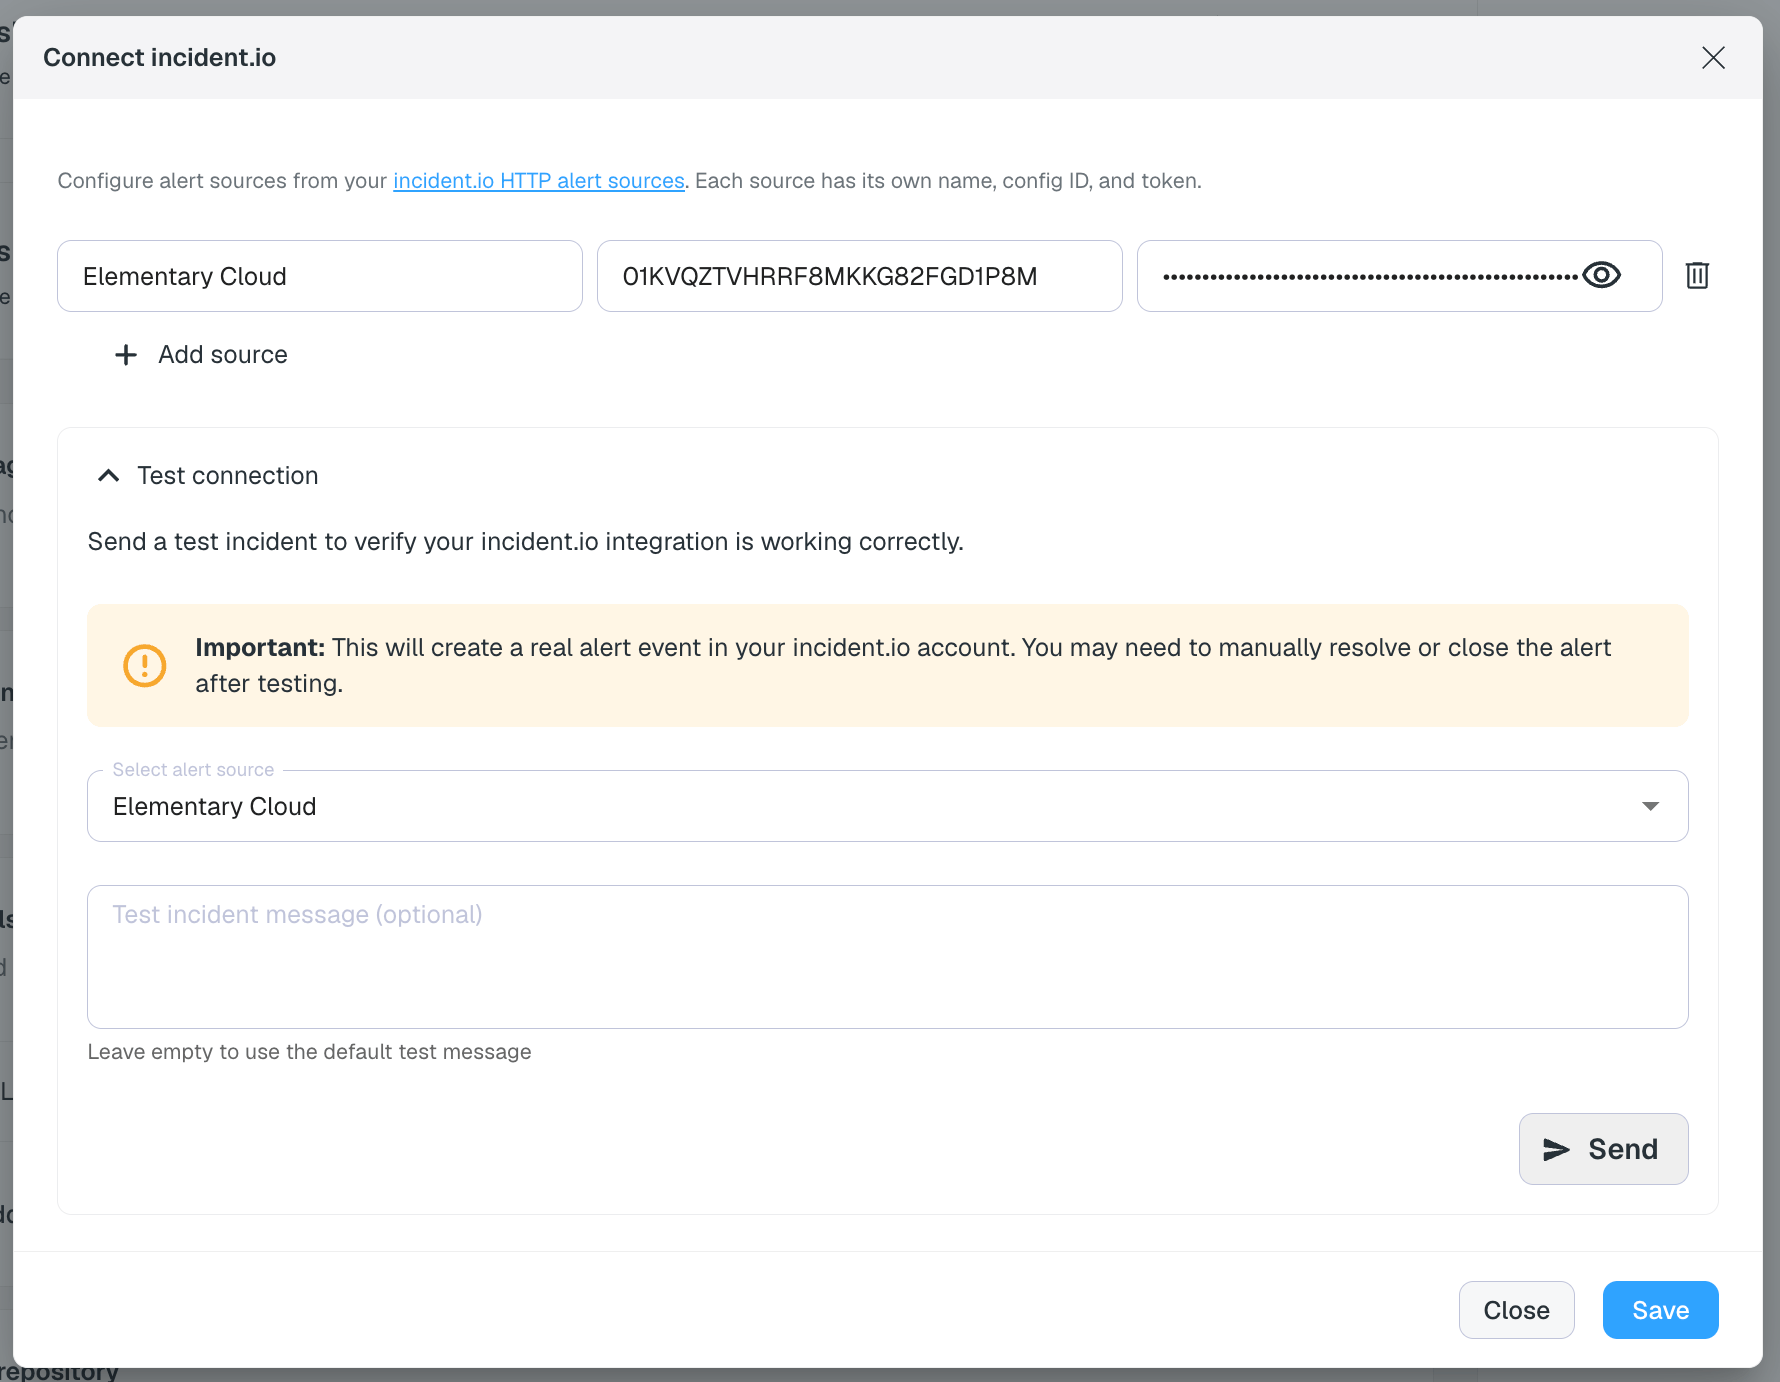
3. Fill in the connection details from your incident.io alert source:
* **Source name** — a display name for this alert source (e.g. "Elementary Cloud")
* **Alert source config ID** — the config ID from the alert source URL
* **API token** — the Bearer token from the authentication headers
4. Expand **Test connection** to send a test alert and verify the integration is working.
The test connection sends a real alert event to incident.io. You may need to manually resolve or close it after testing.
5. Click **Save**. **incident.io** will now be available as a destination on the [alert rules](/cloud/features/alerts-and-incidents/alert-rules) page.
You can add multiple alert sources by clicking **+ Add source** — for example, to route different alert rules to different incident.io alert sources.
## Configure the Alert Source in incident.io
After sending a test alert from Elementary, go back to the incident.io alert source setup page. You should see the test alert appear in the alerts list on the right side. Click **Continue**.
2. You will land on the alert source configuration page, where you can set up:
* **Title** — how the alert title is extracted from the payload
* **Connections** — routing rules for how alerts create incidents
* **Attributes** — map metadata fields from the alert payload to structured attributes (see below)
3. Click **Save** to finish the alert source setup.
## Configure Alert Attributes
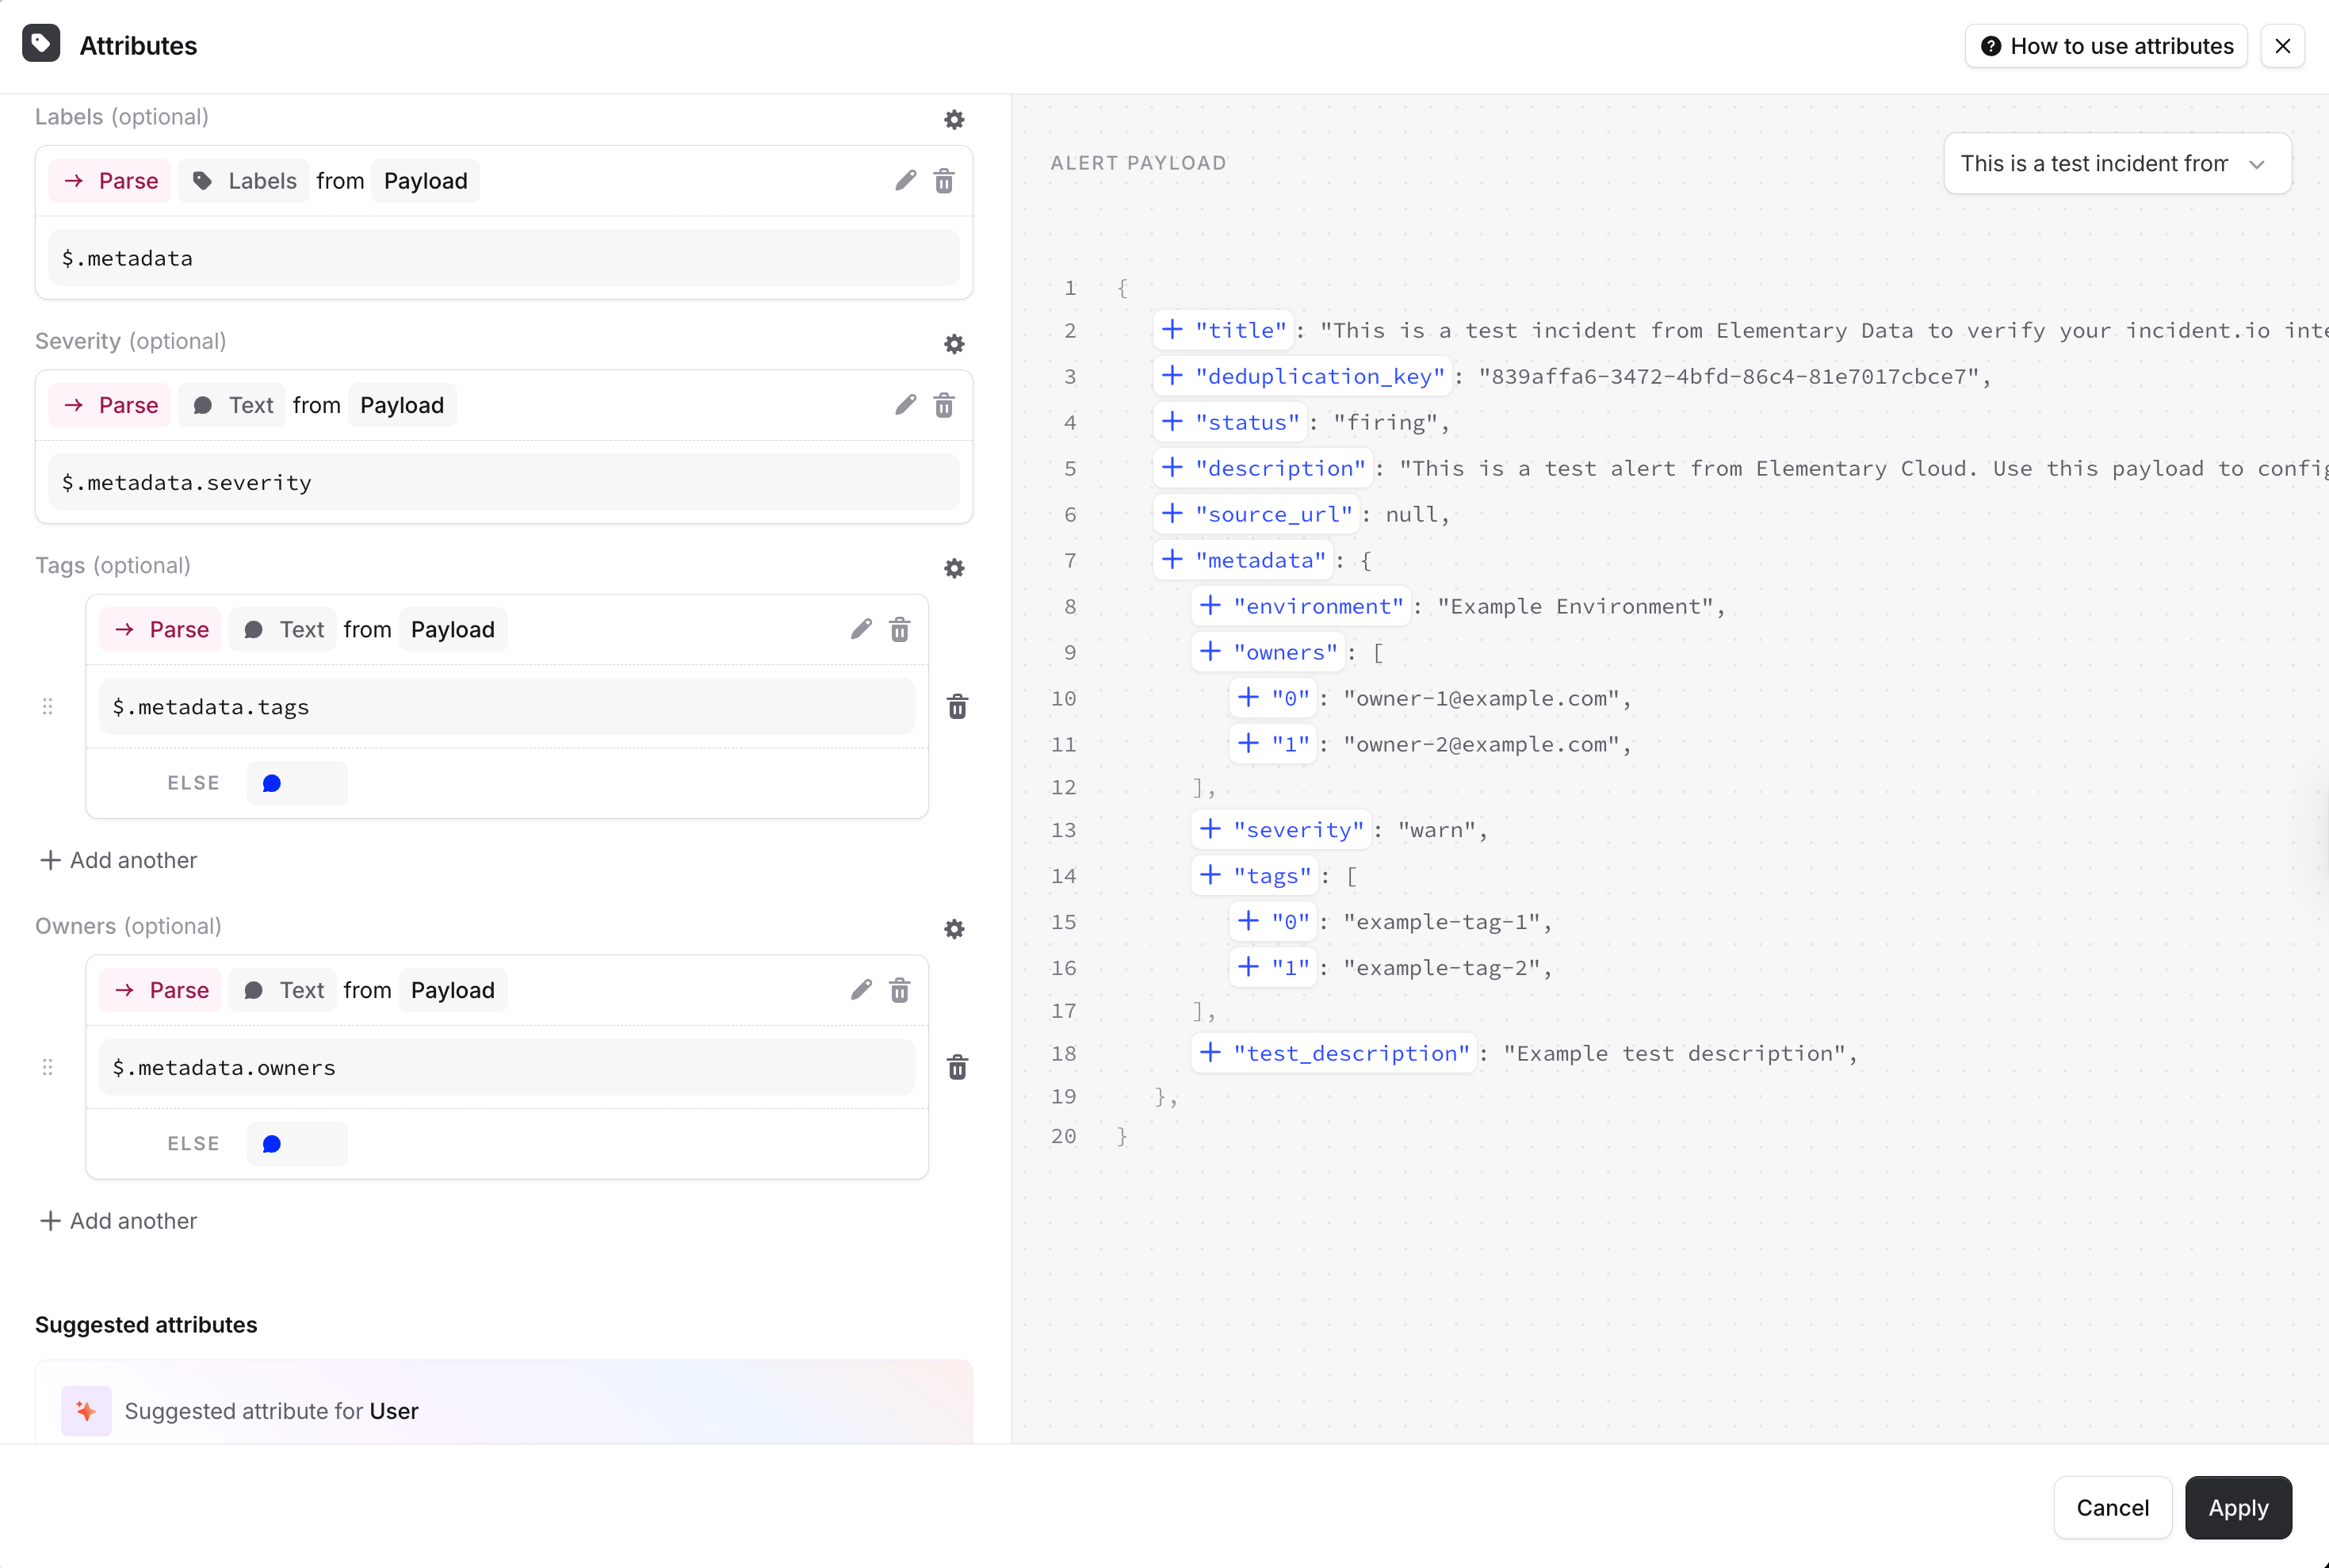
Elementary sends metadata with each alert (such as severity, owners, and tags). To use these fields for routing, filtering, or displaying in incident.io, configure **Alert Attributes** in your alert source settings.
In the alert source configuration, click **Attributes** to map metadata fields. The alert payload is displayed on the right, making it easy to see which fields are available and map them.
### Available metadata fields
Elementary sends the following metadata fields depending on the alert type. All fields are optional — they are included only when the data is available.
| Field | Type | Description |
| --------------------------- | ---------------- | --------------------------------------------- |
| `metadata.severity` | String | Alert severity (e.g. `warn`, `fail`, `error`) |
| `metadata.owners` | Array of strings | Asset and test owners (email addresses) |
| `metadata.tags` | Array of strings | Asset and test tags |
| `metadata.environment` | String | Elementary environment name |
| `metadata.test_description` | String | Test description (test alerts only) |
| `metadata.source` | String | Pipeline tool name (pipeline alerts only) |
| `metadata.connector` | String | Connector name (pipeline alerts only) |
| `metadata.failure_reason` | String | Failure reason (pipeline alerts only) |
When configuring attributes, use the test alert payload as a reference — it includes sample values for the common metadata fields, making it easy to set up mappings.
### Recommended attribute mappings
We recommend mapping these fields in incident.io:
* **`metadata.severity`** → a **Severity** or text attribute — enables routing alerts by severity
* **`metadata.owners`** → a multi-value text attribute — enables filtering and routing by data owner
* **`metadata.tags`** → a multi-value text attribute — enables filtering by tag
For array fields like `owners` and `tags`, make sure to select a type that supports multiple values in incident.io's attribute configuration.
If you need additional metadata fields for your routing that are not currently included, [reach out to us](https://www.elementary-data.com/contact-us) and we'll work with you to add them.
## How alerts work
### Alert creation and deduplication
Each Elementary alert includes a **deduplication key** based on the alert's identity (test, model, or pipeline). incident.io uses this key to:
* **Create** a new alert when a new issue is detected
* **Deduplicate** — avoid creating duplicate alerts for the same ongoing issue
* **Auto-resolve** — when a test passes again, Elementary sends a resolved event with the same deduplication key, which closes the alert in incident.io
### Alert types
Elementary sends the following alert types to incident.io:
* **Test alerts** — dbt and Elementary test failures
* **Model alerts** — dbt model and snapshot failures
* **Source freshness alerts** — source freshness check failures
* **Pipeline alerts** — pipeline connector failures (Fivetran, etc.)
* **Resolved alerts** — automatically sent when a previously failing test/model passes
### Link to Elementary
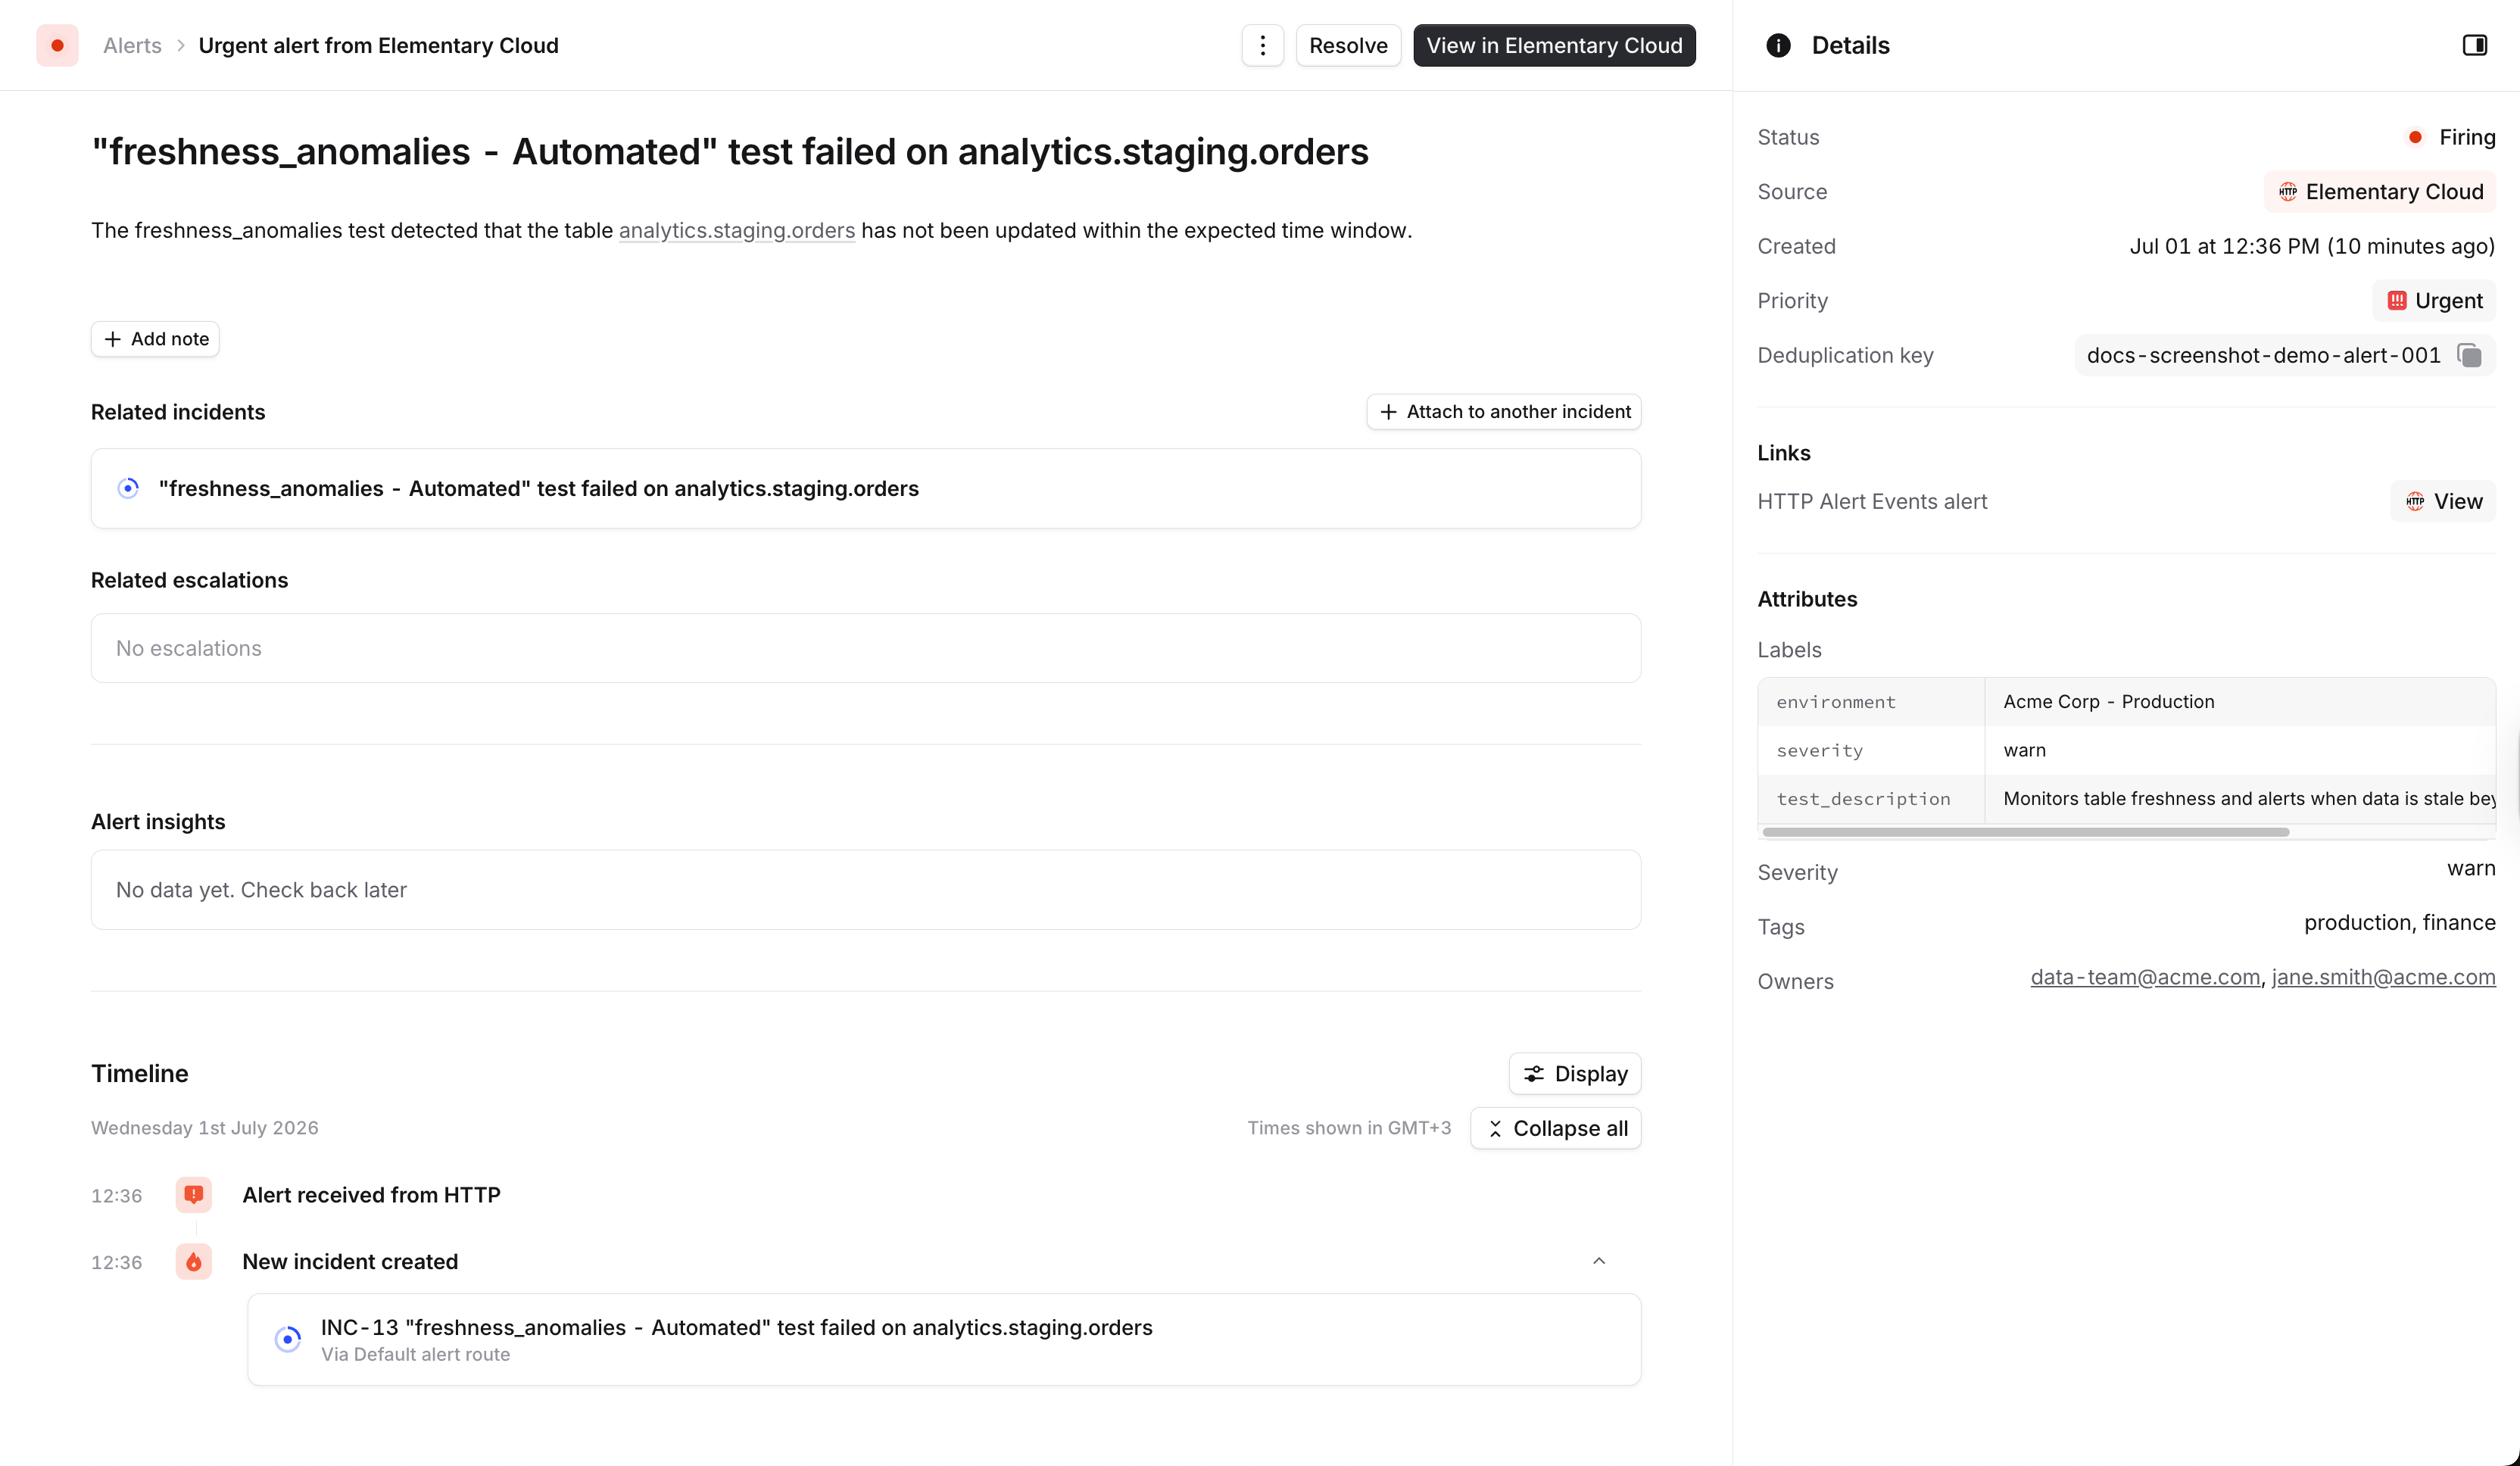
Each alert includes a **source URL** linking back to the relevant page in Elementary Cloud, so you can quickly investigate the issue.
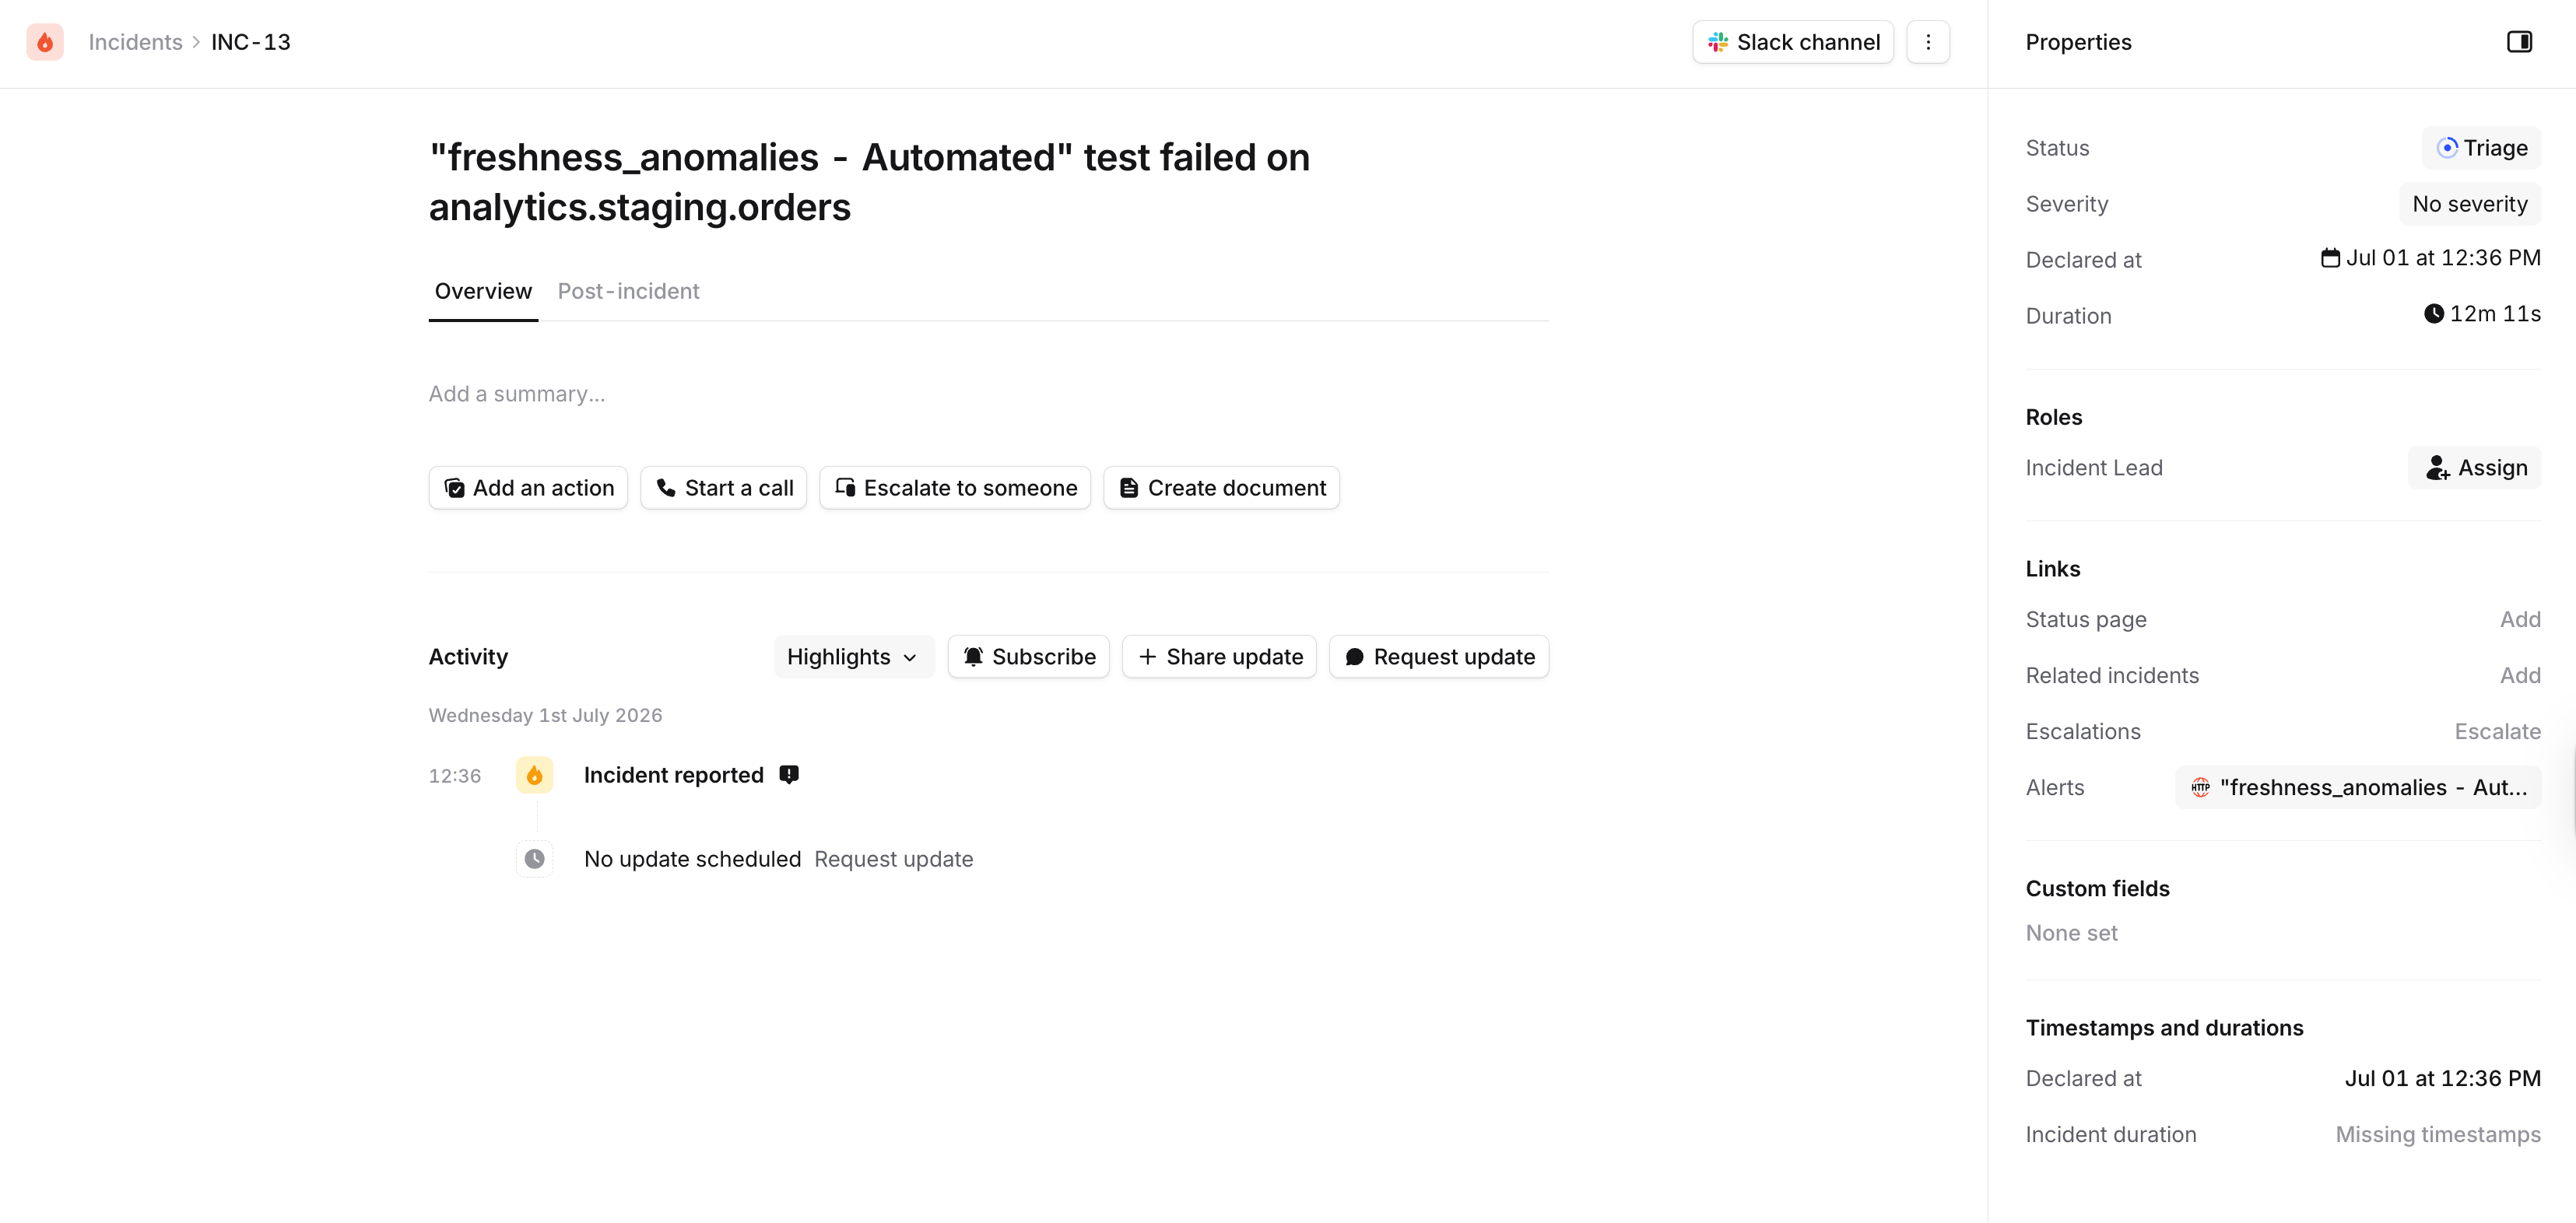
### Alerts and incidents in incident.io
Each alert sent by Elementary appears in incident.io with full metadata, attributes, and a link back to Elementary Cloud.
When an alert matches your incident.io routing rules, it automatically creates an incident with full context.
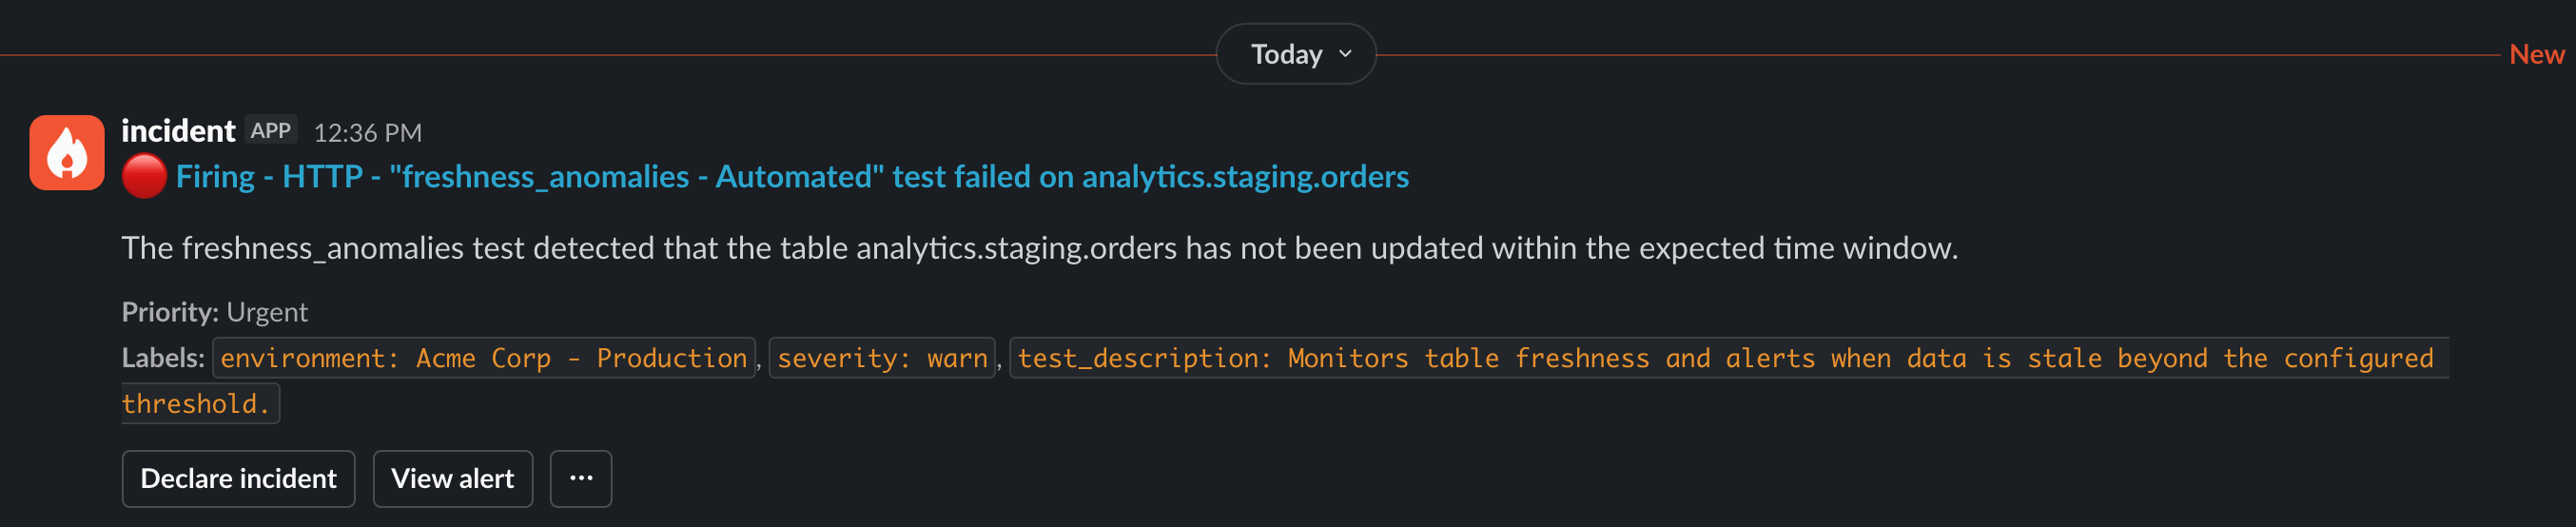
### Slack notifications
If you have Slack notifications configured in incident.io, alerts and incidents will appear in your Slack channels with the alert details, labels, and action buttons.