> ## Documentation Index
> Fetch the complete documentation index at: https://docs.elementary-data.com/llms.txt
> Use this file to discover all available pages before exploring further.
# MCP Setup Guide
This guide walks you through connecting any MCP-compatible client (Cursor, Claude Desktop, and others) to Elementary's remote MCP server.
The server is available at:
```
https://prod.api.elementary-data.com/mcp/
```
## Authentication
Elementary's MCP server supports the **Streamable HTTP** transport with **OAuth 2.1** and dynamic client registration.
When you start the MCP server for the first time, your client opens a browser window so you can log in with your Elementary account. The MCP server uses your authenticated user's permissions directly (user-scoped).
Use the following config in the client setup steps below:
```json filename="mcp.json" theme={null}
{
"mcpServers": {
"Elementary": {
"url": "https://prod.api.elementary-data.com/mcp/"
}
}
}
```
Re-authentication is only required when your session expires or you explicitly sign out.
Use this method for headless setups, CI environments, or any client that doesn't support browser-based OAuth.
#### Prerequisites
| Requirement | Why it's needed |
| --------------------------- | -------------------------------------------------------- |
| **Node.js 18 LTS or newer** | `mcp-remote` runs on Node. Verify with `node --version`. |
| **npm / npx** | `npx` fetches `mcp-remote` on demand. Bundled with Node. |
If you don't have Node.js installed, use [nvm](https://github.com/nvm-sh/nvm) for easy installation:
```bash theme={null}
curl -o- https://raw.githubusercontent.com/nvm-sh/nvm/v0.39.0/install.sh | bash
# Restart your terminal, then:
nvm install --lts && nvm use --lts
```
#### Generate an access token
Go to [User → Personal Tokens](https://app.elementary-data.com/settings/user-tokens) or [Account → Account Tokens](https://app.elementary-data.com/settings/account-tokens) and click **Generate token**. Copy the token and store it securely — it is shown only once.
* **Personal tokens** are user-scoped and inherit your workspace permissions.
* **Account tokens** are account-scoped with "Can View" permissions.
Treat tokens like passwords: do not share or commit them, rotate regularly, and revoke immediately if compromised.
#### Install `mcp-remote` (optional)
Our configs use `npx` to fetch `mcp-remote` automatically — no global install required. If you prefer a global install:
```bash theme={null}
npm install -g mcp-remote@latest
```
Use the following config in the client setup steps below:
```jsonc filename="mcp.json" theme={null}
{
"mcpServers": {
"elementary-remote": {
"command": "npx",
"args": [
"-y",
"mcp-remote@latest",
"https://prod.api.elementary-data.com/mcp/",
"--header",
"Authorization:${AUTH_HEADER}"
],
"env": {
"AUTH_HEADER": "Bearer "
}
}
}
}
```
Replace `` with the token you generated above.
***
## Configure your client
Click the link below to open Claude with the Elementary connector pre-filled:
[Add Elementary connector →](https://claude.ai/customize/connectors?modal=add-custom-connector\&connectorName=Elementary\&connectorUrl=https%3A%2F%2Fprod.api.elementary-data.com%2Fmcp)
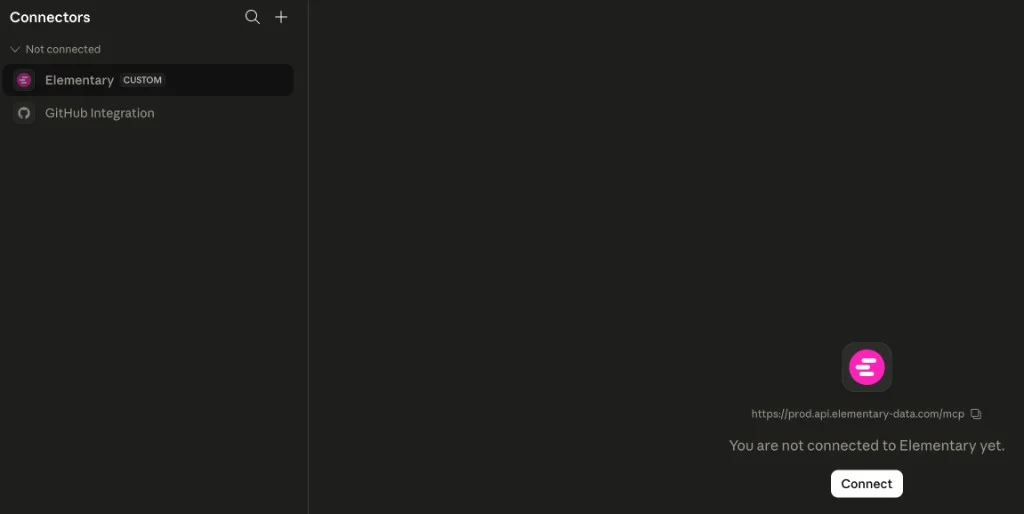
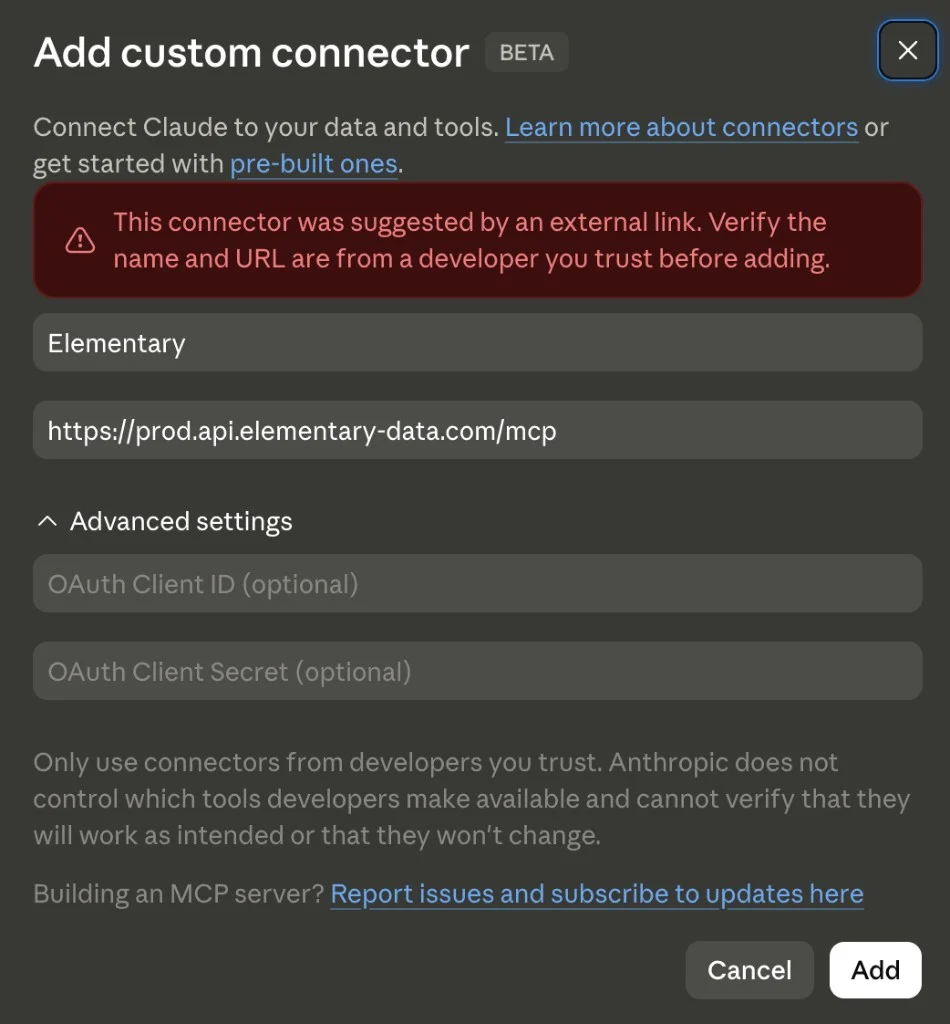 Click **Add**. The Elementary connector will appear in your connectors list.
Click **Connect**. A browser window opens for you to log in with your Elementary account.
Click **Add**. The Elementary connector will appear in your connectors list.
Click **Connect**. A browser window opens for you to log in with your Elementary account.
 In the menu bar, choose **Claude → Settings → Developer** and click **Edit** under **Local MCP Servers**.
Paste the JSON block from the authentication tab above and save.
Quit and reopen Claude Desktop. If using OAuth, a browser window opens on first launch for authentication.
Go to **Settings → Model Context Protocol → Add Custom Server**, or edit `~/.cursor/mcp.json` (global) / `/.cursor/mcp.json` (workspace).
Paste the JSON block from the authentication tab above and save. Cursor restarts its MCP agent automatically.
If using OAuth, a browser window opens on first launch. Log in with your Elementary account to complete authentication.
In the menu bar, choose **Claude → Settings → Developer** and click **Edit** under **Local MCP Servers**.
Paste the JSON block from the authentication tab above and save.
Quit and reopen Claude Desktop. If using OAuth, a browser window opens on first launch for authentication.
Go to **Settings → Model Context Protocol → Add Custom Server**, or edit `~/.cursor/mcp.json` (global) / `/.cursor/mcp.json` (workspace).
Paste the JSON block from the authentication tab above and save. Cursor restarts its MCP agent automatically.
If using OAuth, a browser window opens on first launch. Log in with your Elementary account to complete authentication.